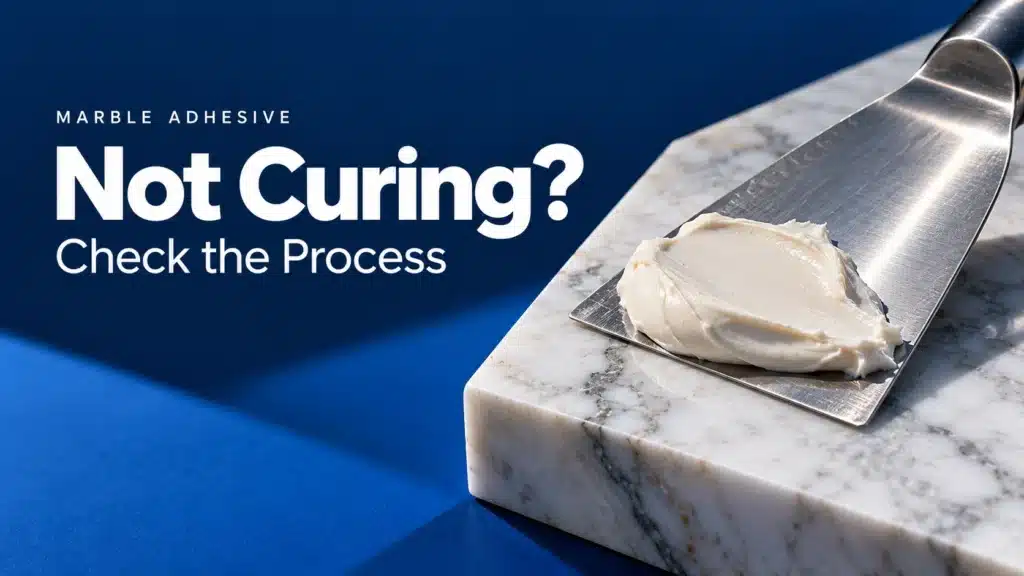
When marble adhesive stays soft, develops sticky patches or becomes unusable before positioning is complete, pause the affected work and reconstruct the mix. The most useful first records are the adhesive and hardener identities, measured quantities, mixing method, material temperatures and elapsed time.
Describe the symptom before changing the process. Slow hardening, uneven curing, surface tack and a hard repair that pulls away from stone require different checks. A controlled repeat on representative offcuts can help narrow the investigation without putting another production piece at risk.
This guide covers knife-grade polyester marble adhesive used for nonstructural interior stone fabrication and local repair. Epoxy systems, sealants and cement-based setting materials have their own components and curing requirements.
Start with These Five Checks
- Identify both components. Confirm the exact adhesive and its specified matching hardener.
- Check the measured dose. Compare the actual quantities and measurement basis with the supplied instructions.
- Review mixing. Establish how the components were blended and whether material at the edges remained unmixed.
- Record conditions. Include adhesive, stone and room temperatures, batch size and the application geometry.
- Check the processing stage. Compare elapsed time with the required handling or finishing stage for those conditions.
Keep the affected component supported and identifiable while investigating. Retain useful labels, photographs and batch information. Use the supplied safety information for handling suspect material and managing waste; keep mixed adhesive out of the original containers.
Describe What Has Gone Wrong
Record where the symptom occurs and when it appeared, including whether the material was already behaving differently during mixing or application.
| Observation | First checks | What the observation cannot establish alone |
|---|---|---|
| Most of the mix remains soft beyond the expected stage | Component identity, dose, mixing, temperatures and storage history | A specific defective component |
| Soft streaks or isolated sticky pockets | Distribution of the hardener and mixing technique | That adding more hardener will correct the joint |
| Exposed surface stays tacky | Product’s expected surface behavior, contamination and cure conditions | The condition through the entire repair |
| Residue in the mixing container hardens while the joint behaves differently | Geometry, stone temperature and application conditions | That the joint is ready for machining |
| Mixture gels before positioning is finished | Batch size, temperature, dose and the time taken to apply | A need to change the ratio outside its permitted range |
| Adhesive is hard but releases from the stone | Preparation, treatments, moisture and the failed interface | That curing was the original problem |

Separate Curing from Adhesion
For a hard repair that pulls out, inspect the stone and adhesive surfaces involved. Dust, wax, sealer, moisture or a weak surface layer can affect the connection even when the adhesive has hardened.
Use a stone-compatible preparation method and investigate the actual interface before making another repair. Where performance verification is required, our stone adhesive bond-testing guide explains specimen records and failure observations. Hand hardness and an intact lump of adhesive do not establish joint performance.
Confirm the Adhesive and Matching Hardener
Read the Supplied Identification
Compare the adhesive grade with the hardener specified for it. Record both batch references and the instructions used. Appearance, tube color or the word “hardener” is insufficient to identify a compatible combination.
KEDA Adhesivo de poliéster tipo «Knife Grade» para mármol is supplied with a matched hardener for its fabrication and repair applications. Keep that pairing identifiable in the workshop, especially where polyester adhesive and two-part epoxy are used nearby.
Review Age, Storage and Container Condition
Check the stated expiry information and the handling history of both components. Note prolonged storage in conditions outside the label requirements, damaged seals, contamination or unexplained changes in appearance. Photograph the condition before attempting any corrective action.
Being within the printed date does not establish that storage conditions were suitable. Equally, an appearance change alone may not identify the cause of a failed mix. Provide the supplier with the combined history and keep questionable material separate pending review.
Check the Hardener Dose and Measurement Basis
Reconstruct the Actual Quantities
Write down what was dispensed, including the adhesive, hardener and any tint. Compare those quantities with the ratio for the actual supplied product. Confirm whether the instructions use weight or volume; the two bases are not interchangeable.
Check that the measuring equipment can resolve the smaller quantity accurately. A hardener amount estimated as a ribbon on a spatula is difficult to reproduce, particularly in a small mix. Also account for material left on dispensing tools when assessing what entered the batch.
Keep Corrections Within the Product Instructions
Use the specified dose when making the repeat trial. Excess hardener can impair a polyester filler’s properties or surface drying, so treating it as a universal accelerator can introduce another problem.
If the label provides an allowed range, follow its stated conditions and obtain clarification where needed. Keep the chosen setting in the record. A dose copied from another adhesive leaves the current mix unexplained.
Inspect the Mixing Method
Blend Material from the Whole Mix
Use clean equipment suitable for the product. Bring material from the edges and bottom into the mixture and blend the components thoroughly using the supplied method. Look for unmixed streaks and pockets, including material around the edge of a mixing board.
Uniform appearance is a useful observation, but similar component colors can conceal incomplete blending. Record the method used, rather than relying on a photograph of the final color alone. Avoid transferring an unmixed edge into the repair at the end of application.
Keep Original Containers Separate
Use separate dispensing tools for the unmixed components and a clean surface or container for blending. Close the original containers after dispensing. Mixed remnants belong in the waste procedure specified for the materials, rather than back in the adhesive container.
For the repeat trial, begin with a clean setup. Reusing contaminated tools can carry the same uncontrolled variable into the next batch.
Check Temperature, Batch Size and Geometry
Measure the Materials as Well as the Room
Polyester curing generally slows in colder conditions and accelerates in warmer conditions. A room reading alone may miss cold stone or adhesive brought from storage. Record the relevant material temperatures and compare them with the product’s permitted processing conditions.
Bring materials into the specified range using an approved conditioning method. Maintain those conditions through the required curing stage. An improvised heat gun, flame or locally heated joint creates an uncontrolled process and should not be used to rescue a suspect repair.
Compare Like-for-Like Applications
A deeper amount left in a container and a thin layer against stone experience different conditions. Record the container, amount mixed, joint thickness or filling depth, and stone condition when comparing them. Container residue hardening first is not a machining release for the workpiece.
For a batch that gels too quickly, review the available application time and work sequence. Prepare the detail and supports in advance, then use a manageable mix size within the product instructions. Keep the component ratio controlled while changing the amount prepared.

Review Tint, Additives and the Stone Surface
Record the exact coloring product, amount and addition sequence. Use only the combination permitted for the adhesive. Excess or incompatible tint can affect behavior, so a color adjustment belongs in the investigation alongside the component dose.
KEDA Pasta de color para adhesivo de piedra is a coloring accessory for compatible systems. It does not replace the matching hardener. Where tint is a possible variable, arrange comparable tinted and untinted trials within the approved method; our color-matching guide explains recipe records.
Check the stone for moisture, cutting residue, surface treatments and cleaning contamination. Record the cleaner used and whether preparation was complete before application. Keep visible darkening separate from the cure description; our marble staining guide covers the related appearance checks.
Reconstruct the Failed Batch Before Repeating It
Use a short record while the operator can still describe what happened. Mark missing information as unknown.
| Record | Details to capture | What to verify |
|---|---|---|
| Product pair | Adhesive grade, hardener identity and both batches | The intended matching combination |
| Quantities | Actual component amounts, ratio basis and measuring equipment | Dose and measurement accuracy |
| Mixing | Tools, container, sequence and blending method | Distribution and possible contamination |
| Conditions | Room, adhesive and stone temperatures; application timing | Agreement with the allowed process |
| Geometry | Batch quantity, container, joint or repair dimensions | Comparable conditions between samples |
| Additions and preparation | Tint, cleaner, surface treatments and drying | Material compatibility and surface condition |
| Observation | Location of softness, elapsed time and operation attempted | The processing stage that was actually assessed |
Run a Controlled Trial on Representative Offcuts
Establish a Documented Reference
Agree a repeat-trial plan with the supplier when the cause is uncertain. Reproduce the intended detail on suitable offcuts using identified components, measured quantities and documented preparation. Follow the permitted conditions and keep the trial pieces supported.
Where available, use an established satisfactory result from the same grade and method as the reference. Identify differences in batches or conditions. Replacement components should be the supplier-specified matching pair; cross-swapping unrelated hardeners creates a new compatibility question.
Change One Relevant Variable at a Time
Start by correcting a documented departure, such as an unverified dose or incomplete preparation. Keep the other conditions comparable and record the result. If the trial still behaves unexpectedly, report that result before making further changes.
Use the comparison to narrow the investigation before assigning a cause.
| Trial outcome | What it suggests reviewing | Next action |
|---|---|---|
| Recorded method succeeds after a documented process correction | The changed process variable | Repeat as agreed and review affected production work |
| Tinted and untinted trials behave differently | Tint identity, dose and sequence | Review the exact combination with the supplier |
| Similar specimens behave differently across conditions | Temperature, geometry or timing differences | Compare the records and investigate the changed condition |
| Repeated correctly documented trials remain unsatisfactory | Material condition and the complete method | Hold the material and request supplier investigation |
| Trial hardens but bonding or finishing fails | Interface preparation and processing stage | Assess the relevant operation before production release |

Decide What Happens to the Affected Work
Waiting, Reworking and Remaking Are Different Decisions
If the material is still within its documented curing schedule, maintain the permitted conditions and reassess at the specified stage. If the dose, matching components or mixing is wrong, obtain guidance on the affected repair rather than relying on extra waiting alone.
Do not spread hardener over an installed soft joint: that cannot recreate a controlled, thoroughly blended mix through its thickness. Plan removal or rework using a method compatible with the stone and product, then restore the required preparation before reapplying. Keep useful evidence before cleaning it away.
Release Each Processing Stage Separately
A satisfactory new trial helps establish a repeatable process. Review the original affected pieces separately, with the required support maintained. Confirm handling, grinding, polishing and service readiness against the actual operation and supplied instructions.
Our marble adhesive properties guide explains these stages. Once the issue is resolved, retain the updated method, component identities and observations for the next production batch.
Send KEDA a Useful Troubleshooting Report
Provide the adhesive and hardener labels, batch references, measured quantities, mixing method, temperatures and elapsed time. Add photographs of the affected detail and the repeat-trial record. Include the stone, treatment, tint and preparation information.
State whether the issue affected one mix or several independently prepared mixes. Then contact KEDA with the records so the application and supplied combination can be reviewed. This gives the investigation a clearer starting point than a description such as “the glue will not dry.”
Frequently Asked Questions
1. Can I add hardener after the marble adhesive has been applied?
A surface application cannot distribute the hardener through the existing joint as a controlled mix. Keep the work supported and obtain guidance on rework. Prepare a fresh, correctly measured trial before repeating the application.
2. How long should I wait before deciding that curing has failed?
Use the supplied product’s schedule for the recorded conditions and intended processing stage. Document how time was measured and where softness occurs. Investigate departures from the specified mix or conditions instead of applying one waiting period to every repair.
3. Should I add more hardener in a cold workshop?
Use only the dose and conditions allowed for the supplied grade. Check the stone and adhesive temperatures as well as the room, and use approved conditioning. Excess hardener can introduce defects and does not establish a suitable low-temperature process.
4. Does a sticky surface mean the whole repair is uncured?
Surface condition alone cannot describe the entire repair. Record its location, elapsed time, geometry and material combination. Compare with the expected behavior for that product and investigate using a documented representative trial.
5. Why does a hard repair pull out during polishing?
Review the bonding surface, contamination, compatibility and readiness for the polishing operation. A hard adhesive can still have an inadequate connection to the stone. Check the exposed interface and trial the intended finishing process before repeating production.