

A marble panel, a marble-look porcelain slab and a stone tile can produce a similar finished wall. Their backs, support requirements and installation methods can be quite different. Selecting an adhesive from the appearance of the front face leaves the most important information unanswered.
Vertical stone installation starts with the panel material and the complete wall assembly. Establish where the panel is supported, what the adhesive touches, how its contact is formed and how the work stays in position during curing.
This guide focuses on planning adhesive interfaces for stone panels and interior porcelain or sintered-stone slabs. It also explains how those interfaces differ from a wall-tile setting bed, so a useful method for one installation is not copied into another.
Select the Installation Method First
A product’s consistency is one part of selection. First identify the assembly in which it will work.
| Installation approach | What the adhesive does | Details to establish before work |
|---|---|---|
| Stone panel within a fixing assembly | Bonds the designated stone-to-support or other specified interfaces | Load path, support and anchor details, contact faces and adhesive geometry |
| Interior porcelain or sintered-stone slab within a fixing assembly | Bonds the designated slab-to-support interfaces | Slab identity, backing, support arrangement, adhesive and temporary restraint |
| Tile or slab installed in a bonded setting bed | Forms the intended bed between the panel and substrate | Substrate suitability, setting material, bed thickness, contact requirements and movement details |
A localized bonding detail and a full-bed setting method need different application and inspection plans. Do not transfer a pattern of adhesive spots into a tile bed, or a notched-trowel method into a support connection, simply because both products are called adhesive.
KEDA’s Posée de revêtements en pierre et de panneaux page is the starting point for discussing panel-to-support applications.
Identify the Panel and Its Actual Back
Natural Marble and Other Stone
Record the stone type, dimensions, thickness, finish and weight. Inspect fissures, previous repairs, treatments and the intended bonding zones. Light-colored or translucent stone also needs an appearance assessment around the proposed joint.
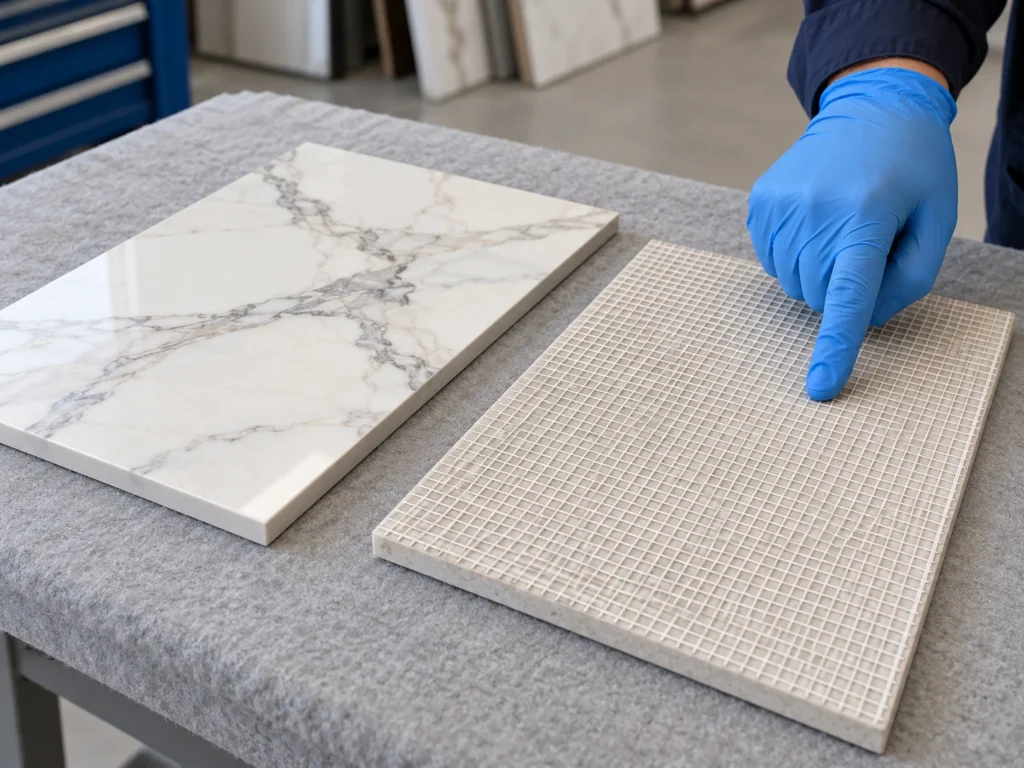
A stone name alone does not describe its back. The production material may have sawn stone, resin treatment, mesh or another applied layer at the contact area. Include those details in the adhesive inquiry and representative trial.
Porcelain and Sintered-Stone Slabs
Identify the actual slab product and obtain its handling and installation requirements. A marble pattern does not turn a porcelain slab into natural marble, and “slab adhesive” does not establish suitability for every panel.
Check whether the back is untreated, textured or reinforced. A factory-applied mesh can have a handling or reinforcing function. Establish whether the proposed interface bonds to that backing or to another prepared surface before changing it.
Our comparison of polyester, epoxy and cement-based marble adhesives explains why the resin or binder name is only one part of the application decision.
Follow the Connection Back to the Building
Identify how the installed panel’s weight and other design loads reach the supporting construction. Review the panel connection, brackets or profiles, their fixings and the wall or structure receiving them.
For a bonded setting bed, include the substrate and its attachment in the review. A board, render, coating or old tile layer is part of the connection when the adhesive bonds to it. A stronger paste cannot establish the capacity of a loose layer underneath.
Resolve support positions and the final panel plane before mixing. If a bracket is out of position or the wall is outside the selected method’s tolerances, correct the assembly rather than increasing adhesive thickness arbitrarily.
Keep Temporary and Permanent Support Distinct
Permanent supports and fixings perform their defined role after installation. Temporary restraints maintain position during placement and curing. An alignment spacer, lifting device or leveling tool serves a different purpose again.
List which items remain, which are removed and the criteria for removal. Include access to those items in the installation sequence so a support is not taken away simply to make the next panel easier to place.
Understand What Non-Sag Describes
A non-sag paste helps control where adhesive is placed on a vertical interface. That handling property does not determine the weight a panel can carry or the moment temporary support can be released.
Assess placement behavior during the trial, then maintain the support required by the assembly throughout installation and curing.
Set Inspection Points Before Interfaces Disappear
Agree the information needed at each stage and who records it. This makes inspection more useful than a final photograph of a finished wall.
| Inspection point | What to inspect or record |
|---|---|
| Panel identity | Material, dimensions, thickness, backing, condition and panel orientation |
| Receiving assembly | Substrate condition, support positions, fixing installation and final face plane |
| Prepared contact faces | Actual surface layer, cleanliness, dryness and preparation method |
| Trial assembly | Adhesive grade, joint geometry, contact formation, appearance and required evidence |
| Placement | Working stage, contact locations, alignment, joint openings and restraint |
| Release and handover | Curing conditions, release criteria, inspections and retained records |
Keep photographs indexed to panel locations. If a coating, backing or preparation method changes during the job, identify the affected areas and resolve the change before continuing with the previous trial as the reference.
A Practical Installation Sequence
1. Plan the Layout and Handling Route
Map panel orientation, visible joints, corners, openings and interfaces with adjoining finishes. Reconcile the layout with the support arrangement and access needed for placement.
Plan how panels travel from storage to the wall using equipment and methods appropriate to the slab. Rehearse difficult turns and positioning steps before adhesive is mixed. Include protection of edges, cutouts and finished faces.
2. Inspect and Prepare Both Contact Surfaces
Remove loose material and contamination using the selected preparation system. Assess coatings, resin layers and backing before abrasion or removal. Preserve the panel features and metal protection required by the installation.
On concrete or other mineral substrates, inspect the layer receiving the adhesive for soundness and contamination. On metal supports, record the actual metal and finish. Photograph the prepared zones before the panel conceals them.
3. Trial the Proposed Interface and Appearance
Use representative panel and support materials, the selected adhesive and the proposed preparation. Reproduce the intended geometry and curing conditions relevant to the assessment.
For the appearance sample, inspect the cured material and surrounding panel face for a visible shadow, dark margin or unwanted color change. The stone adhesive color-matching guide provides a useful process for recording sample appearance; the installation interface still needs its own suitability assessment.
Define any required performance tests and acceptance criteria separately. A neat sample demonstrates appearance and process, while test evidence must address the actual connection and conditions.
4. Dry-Fit the Panel and Restraint
Check the panel’s position, orientation, joint openings and contact with the planned supports. Rehearse access to the adhesive zones, fixtures and cleanup areas.
Resolve rocking, interference or misalignment now. Plan the position of temporary restraints so they maintain the intended fit without concentrating pressure at a vulnerable edge or cutout.
5. Measure and Mix a Manageable Batch
Confirm the adhesive grade, component identities, ratio and measurement basis from the supplied instructions. Equal package volumes do not establish an equal mixing ratio.
Use separate tools to dispense the components and mix with the stated method, including material at the sides and bottom of the mixing area. Similar component colors can make incomplete mixing difficult to recognize, so color uniformity is only one observation.
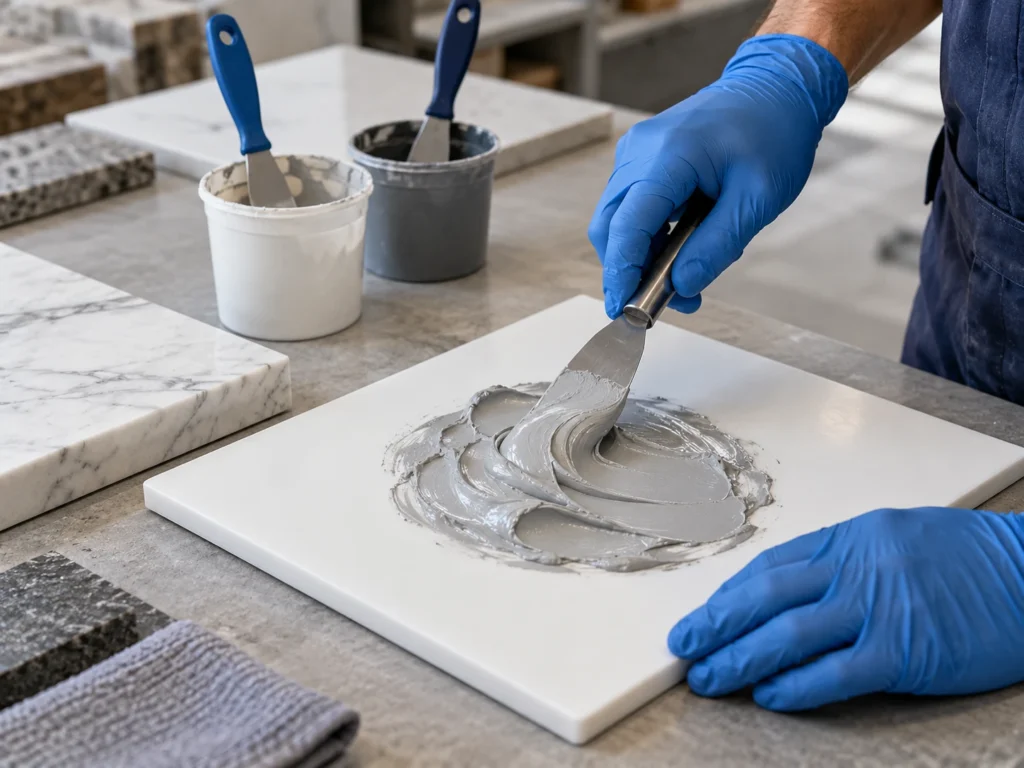
Match the batch to the achievable placement rate. Record mixing and application times, keep mixed material out of the original containers and discard material that has passed its working stage. Follow both components’ safety information for handling, ventilation and protective equipment.
6. Form the Intended Contact
For a specified support interface, apply adhesive at the designated contact zones and maintain the designed bond-line geometry. For a bonded setting bed, use the selected system’s spreading and contact-verification method.
Inspect representative contact formation during the trial and at the agreed installation checks while inspection is still possible. A squeeze-out line around an edge cannot describe all the material hidden behind a panel.
Keep movement joints and other designed clearances open. Do not use rigid epoxy to close a joint intended to accommodate movement.
7. Position and Check the Finished Plane
Bring the panel into the rehearsed position within the working period. Check the intended joint openings, face alignment and panel orientation, then maintain restraint without disturbing the assembly.
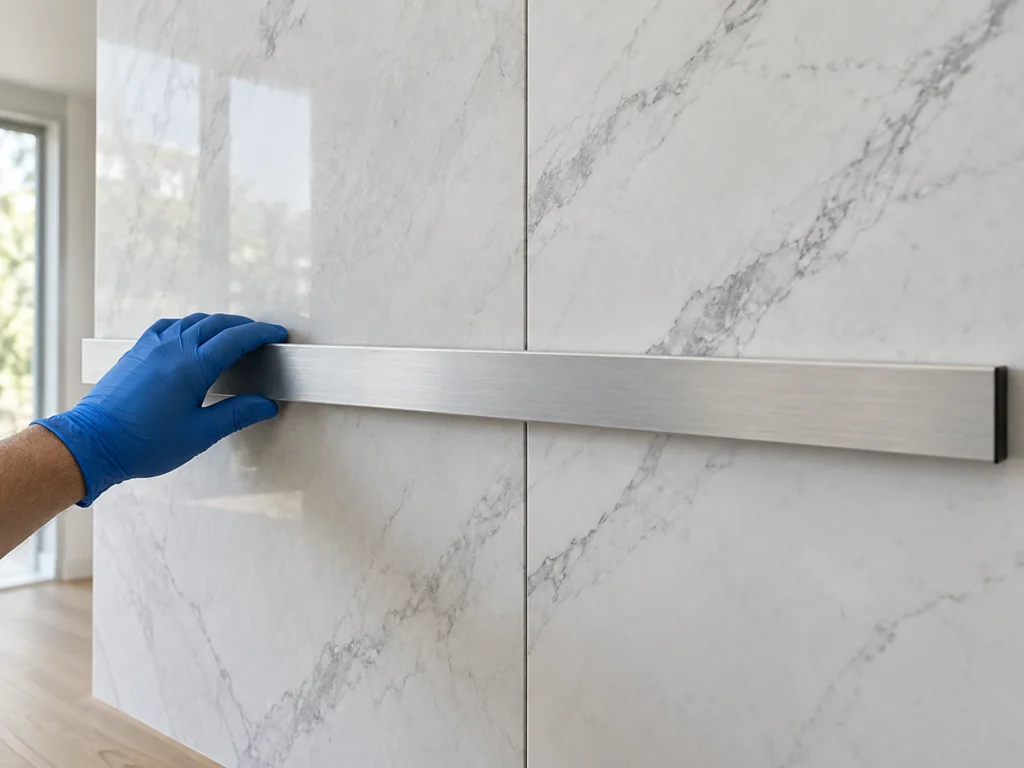
Resolve alignment while the process still allows it. Grinding a polished face afterward can create an additional appearance problem and does not correct an installation-system issue behind the panel.
8. Protect, Inspect and Release
Protect the work from impact, vibration and the exposure conditions identified in the installation plan. Record actual material and site conditions during curing.
Establish release for the next operation using its stated criteria. Fixture removal, subsequent handling and service loading are separate decisions. Our marble adhesive properties guide explains these curing-stage distinctions.
Retain the panel-location record, material and component batches, preparation photographs, trial results, installation observations and release decisions for handover.
Common Problems and the First Check
| Observation | Start the investigation here |
|---|---|
| Panel shifts during placement | Support and restraint arrangement, contact fit and the material’s working stage |
| Finished faces are uneven | Panel geometry, receiving plane, support position and positioning sequence |
| Paste remains soft or streaked | Component identity, measurement, mixing, temperature and elapsed curing stage |
| Dark spots or margins appear | Actual stone or slab, treatment, adhesive distribution and compatibility trial |
| A test interface separates | Record where separation occurs: panel, backing, coating, adhesive or receiving substrate |
| An installed panel moves or cracks | Assess the panel and fixing assembly before attempting a cosmetic repair |
A tapping sound or a flat-looking face alone does not establish connection capacity. For a suspected loose panel, arrange an appropriate assessment and safe access before disturbing it. Keep the evidence needed to identify the cause instead of covering the affected interface with more material.
Two Different KEDA Product Discussions
Stone Installation Interfaces
Adhésif époxy structurel à deux composants KEDA is the relevant starting point for designated stone-cladding and stone-to-support bonding interfaces. Provide the actual stone, contact materials, support drawing and exposure so the grade can be reviewed within the installation assembly.
For an exterior application, add the exposure and water-management review described in Outdoor Marble Bonding: Exposure, Fixings and Adhesive Verification.
Interior Porcelain and Sintered-Stone Panels
Colle époxy pour dalles KEDA à faible odeur is positioned for interior porcelain and sintered-stone wall-panel interfaces within a fixing system that incorporates the required mechanical fixings.
Keep that inquiry distinct from natural-marble tile bedding, shower installation, floors, ceilings or exterior facades. The described interior dry-fixing method is not presented as a bathroom or shower system. Low odor also leaves the need for the supplied safety information and suitable ventilation unchanged.
For either inquiry, start with the panel material, location, backing, adjoining contact material and proposed installation method. Photographs or a drawing help the supplier understand the interface before discussing quantity, packaging and destination market.
Conclusion
Vertical stone and slab installation works as a coordinated assembly. Identify the panel and its backing, establish the support and fixing arrangement, and trial the actual adhesive interface. Inspect preparation and contact before they are hidden, control positioning and curing, and retain the evidence used to release the work.
Foire aux questions
1. Does non-sag epoxy hold a wall panel without support?
Non-sag describes placement behavior. Panel support, temporary restraint and the role of the cured adhesive come from the installation-system design. Establish those details before placing the panel.
2. Can the same method be used for marble, porcelain and sintered stone?
Compare the actual panel, backing, substrate and installation system. Similar finished appearances do not establish identical preparation, adhesive or fixing requirements.
3. How many adhesive spots should be used behind a slab?
There is no universal spot count for all panels. A designed support interface specifies its contact geometry; a bonded setting-bed system has its own contact requirements. Identify the method before planning adhesive distribution.
4. When can temporary supports be removed?
Use the selected product’s curing requirements, recorded conditions and the installation’s release criteria. Surface hardness or a universal elapsed time cannot establish readiness for every assembly.
5. Is low-odor slab adhesive a waterproof shower installation system?
No. An adhesive, waterproofing layer and panel-fixing arrangement perform different roles. The KEDA interior dry-fixing application described here is not recommended for bathrooms or showers; select a separate system suited to that location.
Planning a vertical stone or interior slab installation? Contacter la KEDA with the panel, backing, contact materials, proposed fixing method and order requirements to begin product selection.