

A practical marble tile installation plan connects the stone, substrate, setting material and site sequence before mixing begins. The useful question is not simply which adhesive bonds marble. It is which complete installation system suits the delivered stone, prepared surface and intended service.
Use this guide to organize a marble floor project from the initial survey through handover. Establish the material and installation requirements, rehearse the method on a representative sample, then keep placement and appearance records as work proceeds.
The process below is a planning framework. The selected system supplies the actual ratios, thickness limits, working conditions and readiness requirements.
Step 1: Establish the Project Conditions
Start with a short written brief. Identify the floor location, exposure, stone specification, structural substrate, proposed build-up and expected access. Give the designer, installer and material supplier the same information.
| Project information | What to record | Decision it supports |
|---|---|---|
| Location and service | Interior or exterior, wet exposure, heating and traffic | Stone and system suitability |
| Delivered stone | Dimensions, finish, thickness variation and back treatments | Adhesive selection and handling |
| Supporting substrate | Construction, retained layers, condition and survey findings | Preparation and assembly design |
| Finished geometry | Elevation, slope, doorways, drains and adjacent finishes | Build-up and transition coordination |
| Joint arrangement | Grout joints, movement provisions and perimeter details | Layout and material roles |
| Construction sequence | Crew access, other trades, protection and use dates | Placement and readiness planning |
Resolve responsibility for unresolved items before they become site improvisations. For example, identify who will correct a low substrate area and who will adjust a doorway if the proposed build-up does not fit.
Keep floor setting separate from countertop seams, stone repairs and wall-panel fixings. The marble adhesive selection guide explains those different application families.
Step 2: Inspect the Stone That Arrives
Check Faces, Edges and Backs
Open the supplied batch and compare pieces before installation. Record shade and vein distribution, finish, chipped edges, dimensions and thickness variation. Keep carton identification and photographs with the delivery record.
Turn over representative pieces. Identify sawn profiles, retained dust, mesh, resin or other treatments. A trade name or attractive face does not describe the surface that the adhesive will contact.
Set damaged or questionable pieces aside for review. Avoid incorporating an unexplained backing or contamination into the trial and assuming the setting material will compensate for it.
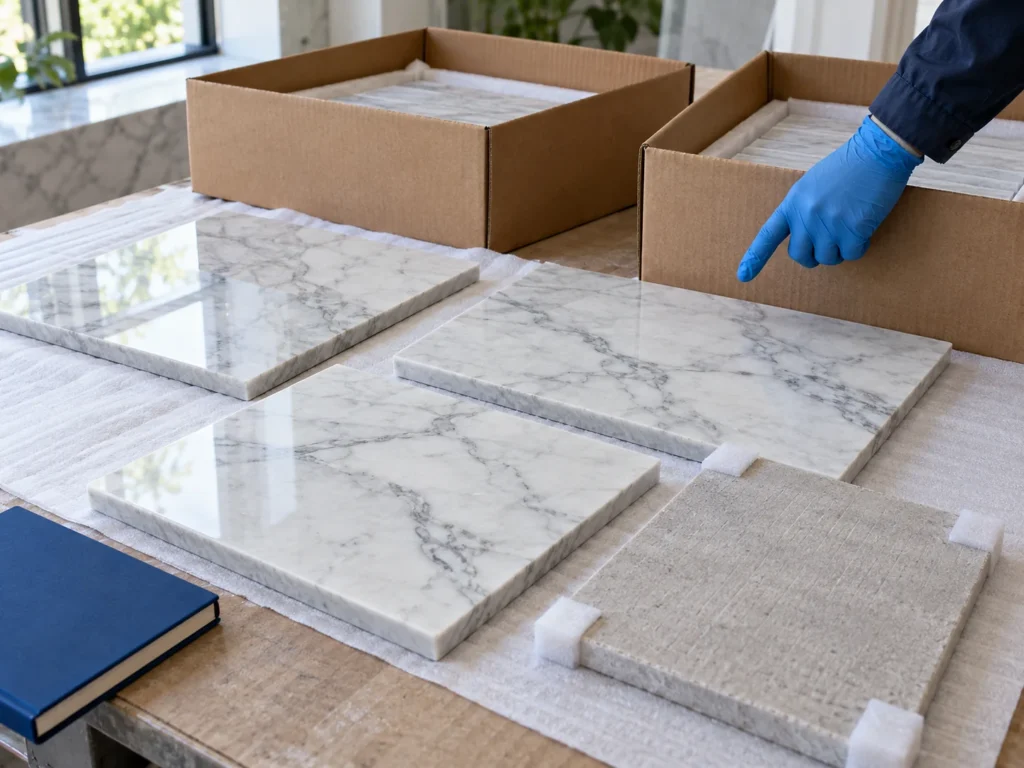
Organize Appearance and Reserve Material
Review the batch with the person responsible for the finished appearance. Blend or sequence pieces to suit the intended design, and keep a record of any deliberate pattern arrangement.
Reserve suitable pieces for cuts, borders and future matching. Determine extra quantities from the actual layout and cutting plan rather than applying one universal percentage to every room.
Keep stone quantity, adhesive consumption and grout quantity as separate calculations. They depend on different inputs and should remain separate in purchasing records.
Step 3: Prepare the Receiving Surface and Select the System
Survey Before Correcting
Check substrate soundness, cleanliness, local flatness, elevation and any required slope. Record cracks, loose layers, contaminants and moisture conditions for investigation. A flat surface and a level surface are not the same requirement.
Complete the specified removal, repair or preparation work before setting. Use compatible preparation materials within their application limits. Establish the condition required for the next layer instead of relying on appearance alone.
Confirm structural support through the project requirements. A stronger adhesive or a thicker bed does not resolve inadequate support. Where boards, membranes or other retained layers are involved, identify the complete assembly and its installation requirements.
The thin-set and thick-bed guide explains the roles of a bonding layer, preparation material and mortar bed.
Select Adhesive for the Actual Interface
Match the product to the natural stone, retained backing, receiving surface and exposure. Check its permitted installed thickness, required mixing basis and compatibility with any intermediate layer.
For pale or translucent marble, include adhesive color and background in the appearance review. A white material may suit a particular stone, but it is not a universal guarantee against staining, moisture effects or visible patterns.
Wet areas need the designed waterproofing and drainage arrangement. Heating and exterior exposure introduce additional system requirements. Do not infer those uses from a general “tile adhesive” or “epoxy” description.
Step 4: Dry-Lay and Build a Representative Sample
Plan More Than the Starting Point
Dry-lay enough pieces to review the main viewing direction, vein distribution, joints and cuts. Check doorways, corners, drain positions and changes of material before fixing the reference lines.
Choose a starting arrangement that works with those constraints. Starting in the room center is one layout option, not a rule for every project. Record any sequencing needed to reproduce the intended appearance.
For larger pieces, plan access, lifting and placement before mixing. Use suitable handling equipment and support the stone throughout the operation. See the large-format marble guide for related selection and handling questions.
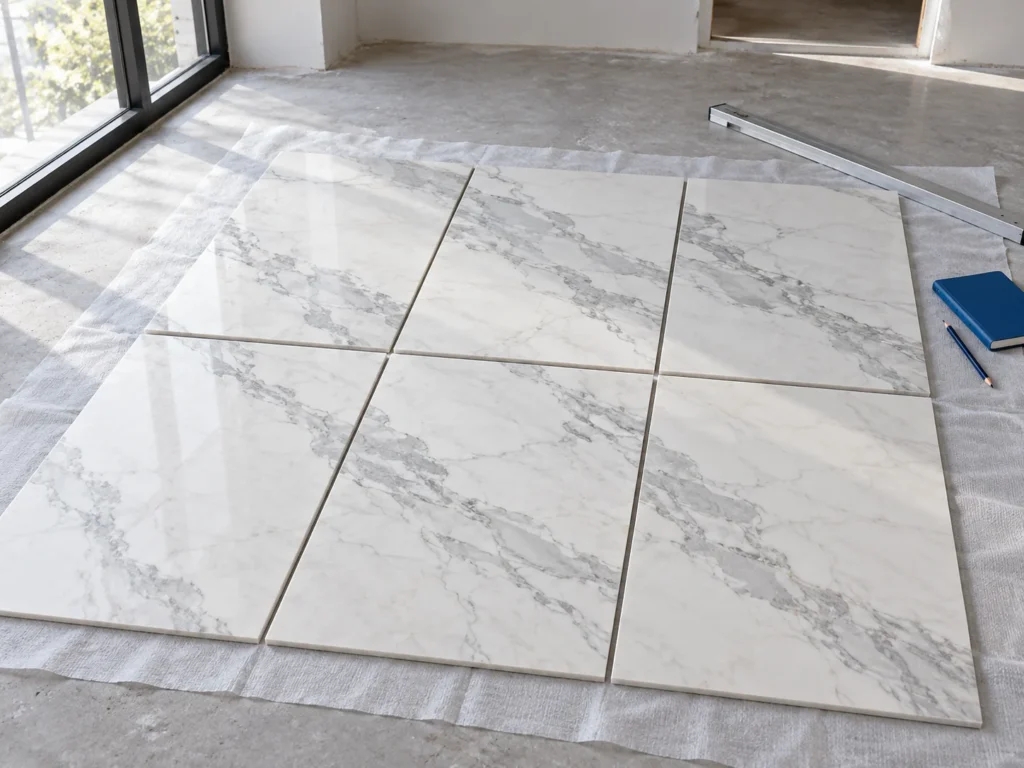
Rehearse Setting, Grouting and Cleanup
Use the actual stone batch and intended system in the sample. Include a joint, a cut edge and an important transition where practical. Keep an uninstalled stone reference for appearance comparisons.
| Trial item | What to record | What to resolve before repeating the method |
|---|---|---|
| Material preparation | Product, batch, mixing basis and conditions | Reproducible handling within the instructions |
| Placement | Tool, spreading area, embedding and thickness control | A workable method for the actual backs and substrate |
| Contact observations | Lifted locations, backs, bed and photographs | Required bedding and edge support |
| Appearance | Cured color, visible patterns and comparison reference | Acceptable background and material combination |
| Grout and cleanup | Joint preparation, grout, tools and cleaning sequence | Surface response and manageable work sections |
Keep appearance observations and placement checks distinct from performance testing. A sample can reveal a problem without supplying a measured bond-strength result.
Step 5: Mix and Spread Within the Working Process
Prepare the Batch Deliberately
Set out clean tools, measured ingredients and the required mixing equipment. Follow the selected product’s ratios, sequence, mixing, resting and remixing instructions. A water-mixed powder and a multicomponent resin require different preparation records.
Mix an amount that fits the crew’s placement sequence and conditions. Record the batch time where useful. Do not add water or solvent to revive material that has lost workability unless the product instructions expressly permit the operation.
Distinguish mixed-material life in the container from open time after spreading and adjustment time after placement. A usable bucket does not prove that material spread earlier still provides suitable transfer.
Control the Spread Area
Apply the material using the specified keying and troweling process. For a combed-bed method, follow the prescribed ridge direction and embedding movement. Work in sections that the crew can place and inspect while the material remains suitable.
If spread material skins over, remove and replace it as directed. Re-combing a skinned surface or wetting its top is not a substitute for fresh material and reliable transfer.
Keep the installed layer within the product’s limits. The trowel notch is a tool dimension, not a direct measurement of the embedded bed. Resolve significant substrate correction through the preparation process.
Step 6: Set, Inspect and Adjust During Placement
Place stone against the layout references and use the selected embedding method. Maintain the intended joint arrangement and surface continuity while avoiding contamination of the visible faces.
Inspect representative pieces by lifting them at the appropriate stage. Review the back and receiving bed together for effective transfer and the specified contact distribution, including edges and corners. Back-buttering where required supports the process; a coated back by itself is not proof of bedding contact.
Record changes in tool, operator, stone backing or conditions, and repeat checks when they affect the process. If the trial method stops producing the intended result, investigate before spreading a larger area.
Track consumption separately from contact. The coverage and consumption guide explains the difference between inspected contact percentage and kilograms per square meter.
Check alignment, adjacent-edge differences and joints as placement proceeds. Make adjustments within the material’s permitted window. Remove excess from faces and joints while this can be done without disturbing the stone or damaging underlying layers.
Maintain designated movement and perimeter joints through the relevant work. Their location and treatment follow the project detail. Rigid adhesive or grout does not replace the specified movement-joint material.
Step 7: Grout, Clean and Protect the Work
Prepare the Joints and Check Readiness
Confirm that the setting system is ready for grouting. Keep this decision separate from permission for general traffic or equipment loading.
Remove joint obstructions to the depth required by the grout. Use methods that protect the stone edges and any membrane beneath them. Keep movement joints free of rigid grout.
Select grout for the actual joint range, stone finish and exposure. Rehearse application for scratching, staining, residue and the intended color. A generic sanded-versus-unsanded width rule cannot replace the product’s instructions and stone trial.
Use a Stone-Compatible Cleanup Method
Coordinate grouting and cleaning so the crew can complete each section within the material’s process. Keep mixing and cleaning practice consistent across the work.
Where a sealer or grout release is specified, include it in the sample and control its application. Surface protection, substrate priming and waterproofing serve different purposes. Avoid contaminating bonding faces or joints with an unsuitable treatment.
Use cleaners suited to the marble and residue. Acid cleaners can etch acid-sensitive marble; increasing cleaner strength is not a general solution to grout haze. Investigate difficult residue on a spare sample before treating the floor.
The staining and visible glue-line guide helps distinguish appearance problems that need different responses.
Agree on protection against other trades, abrasive debris and premature use. Select covering and tape practices compatible with the finished stone and system condition, and maintain the required site conditions during curing.
Step 8: Inspect and Hand Over a Traceable Record
Review the floor under the agreed viewing and lighting conditions. Record surface appearance, alignment, joints, transitions, remaining residue and any items requiring attention.
Keep visual observations separate from hidden-interface conclusions. Sounding may help locate differences for investigation, but it does not independently measure bond strength or identify every cause. Where performance testing is specified, use the defined method and acceptance criteria.
The stone adhesive testing guide explains how substrate, interface, test method and failure mode affect performance evidence.

| Handover item | What to retain | Why it remains useful |
|---|---|---|
| Material identification | Stone batch, setting products, grout and treatments | Future matching and technical inquiries |
| Installation record | Preparation, sample, placement observations and changes | Understanding how the floor was built |
| Completion review | Photographs, locations and resolved or outstanding items | Clear responsibility for follow-up |
| Access and protection | Conditions for grouting, traffic, loading and wet use | Coordinated release of the work |
| Care and spares | Compatible cleaning instructions and spare stone | Maintenance and future repair planning |
Send KEDA the Application Details
For a floor-setting inquiry, provide stone dimensions and back photographs, substrate, location, proposed build-up and expected quantity. Include sample observations where available.
KEDA’s C110 description concerns suitable interior ceramic tiles and ceramic mosaics; it does not establish a natural-marble floor recommendation. A fabrication adhesive or designated slab-interface paste also has a different role from a full-bed floor-setting material.
Explore the KEDA product range and contact KEDA with the application details to discuss the relevant material category.
Frequently Asked Questions
1. Can I use any tile adhesive for marble floors?
Choose for the actual stone, backing, substrate and exposure. A ceramic-tile description or resin name alone does not establish suitability for natural marble or the proposed floor system.
2. Does white adhesive prevent marble staining?
White may suit the appearance requirements of a particular stone. Evaluate the complete build-up and cured sample, including moisture effects, retained treatments and grout. Color alone is not a compatibility result.
3. Should I install over adhesive that has formed a skin?
Remove and replace skinned spread material as directed, then review the work area and placement sequence. Re-combing or wetting the surface is not a reliable way to restore the intended transfer.
4. How long should I wait before grouting or walking on the floor?
Use the selected system’s requirements for each activity and actual conditions. Grouting, light traffic, equipment loading and wet exposure may have different readiness points. Record them separately in the site schedule.
5. Does a hollow sound prove that the adhesive has failed?
A sound difference is an observation to investigate. It does not independently establish bond strength, identify the failed interface or explain the assembly below. Review installation records and use appropriate testing where required.